

The 100% disk usage error in Windows 10 makes your computer extremely slow. In this case, opening a website or a program will take a long time, making it almost impossible to use the PC. The fairly common failure can happen even on new devices, both traditional hard drives, and SSDs. And, as in most cases, it can be caused by various reasons.
Disabling Windows Search, increasing virtual memory, and using an antivirus to find malware are some of the measures that can fix the bug in Microsoft’s system. Here are five ways to end the 100% used disk error, with step-by-step steps for each.
1. Disable Windows Superfetch
SuperFetch is a feature that caches frequently used programs so that they can be opened more quickly. To do this, it runs in the background, and in some cases, can use up too much of your hard disk. Therefore, the solution is to disable the service.
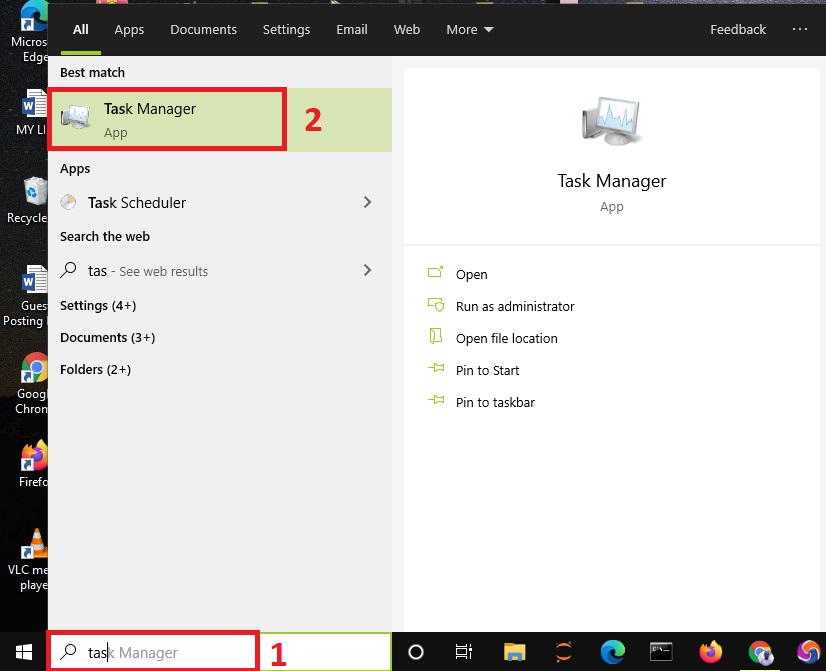
Step 1: Before disabling Superfetch, it is worth checking whether it is the cause of the problem. Click the search button in the Windows taskbar and type “Task Manager”. Open the application;
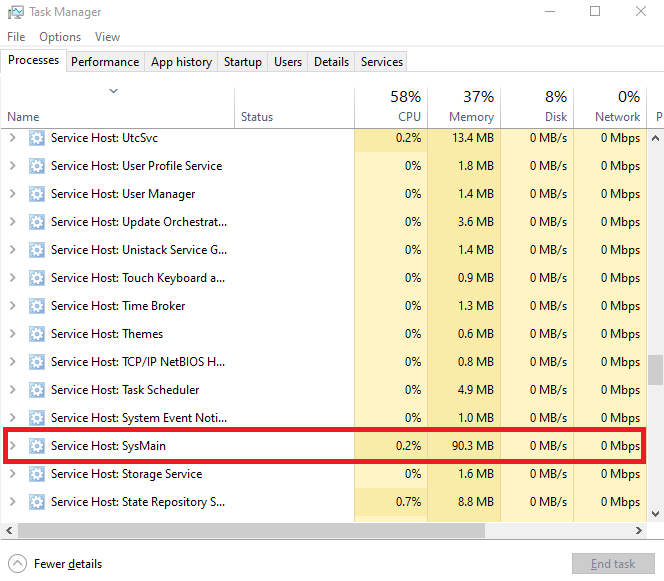
Step 2: Click on “More details” to open the detailed version of Task Manager. Look in the list for “Service Host: SysMain” and check whether it is using too much of your hard disk. In the example below, SysMain (the name of the Superfetch on the system) has no problems. But if it is using more than 1 MB/s on “Disk”, it is worth deactivating the application;
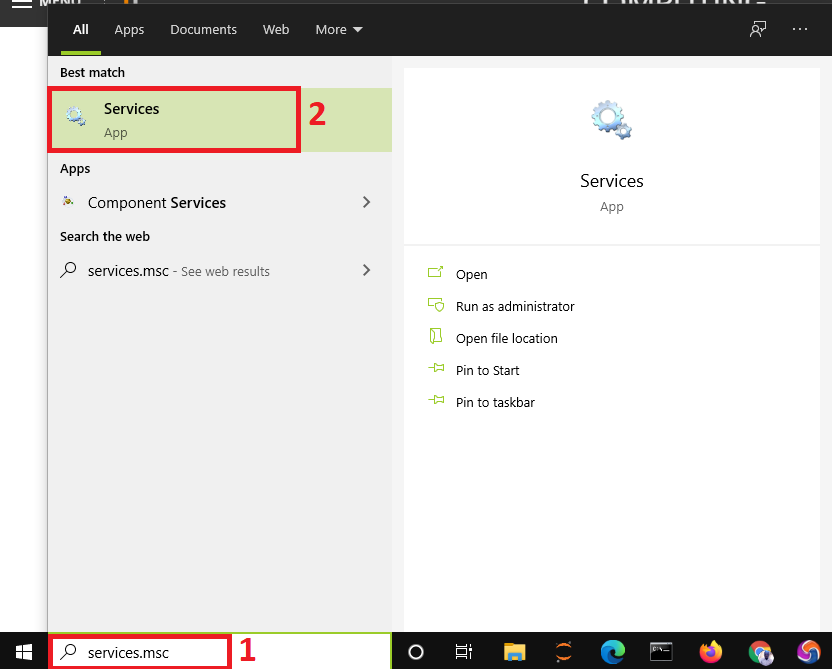
Step 3: To disable Superfetch, click on Windows 10 search, type “services.msc” (without the quotes), and then open the “Services” application;
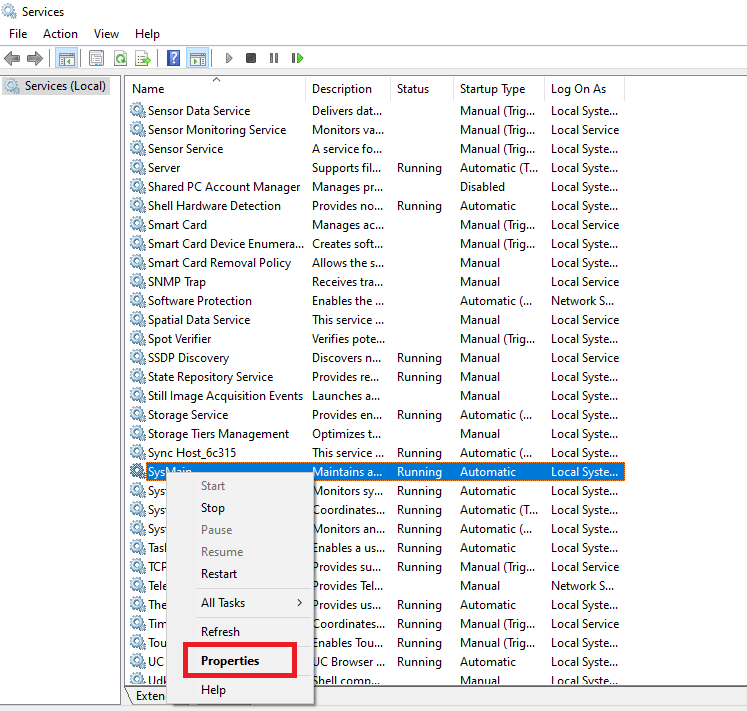
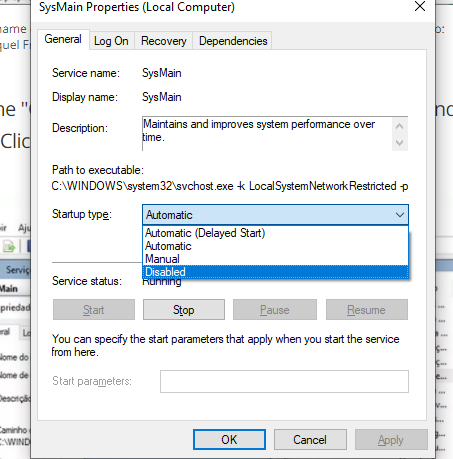
Step 4: Scroll down until you find “SysMain” in the list. Right-click on the item and go to “Properties”;
Step 5. in the “General” tab, click in the “Startup Type” field and select “disabled”. Click “OK” and then restart the system.
2. Increase virtual memory
When the computer runs out of available RAM, it uses part of the hard disk as expanded virtual memory. And if this memory is also being fully used, the PC will be slow or display the disk 100% error. One solution for this is to increase the virtual memory.
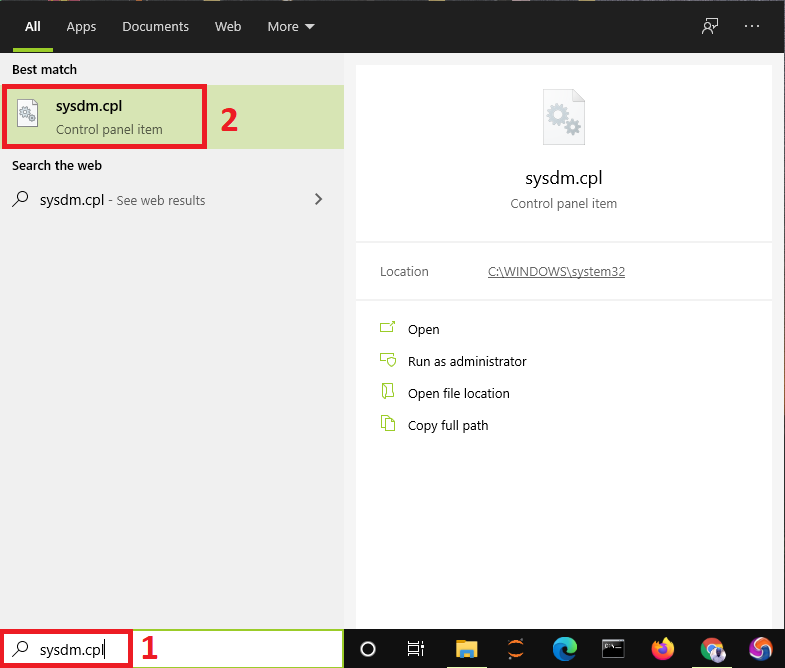
Step 1: in the Windows search box, type “sysdm.cpl” (without quotes). Click on the Control Panel item;
Step 2: the “System Properties” window will open. Click on the “Advanced” tab and in the “Performance” field press the “Settings” button. The “Performance Options” window will open. Click on the “Advanced” tab, go to “Virtual Memory” and press the “Change” button;

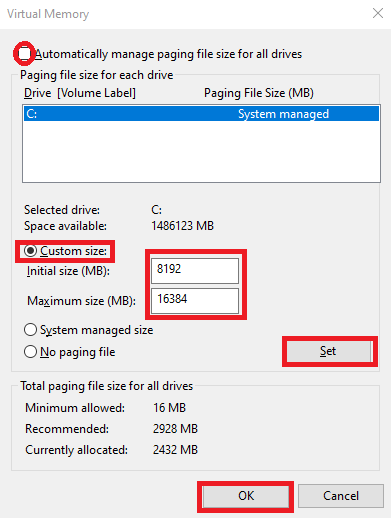
Step 3: Uncheck the box “Automatically manage paging file size for all drives”. Then check “Custom Size”. In the “Initial size” field, enter the total amount of RAM available on your computer in megabytes – 1 GB is 1024 MB, for example. In the “Maximum size” field, enter twice the value from the first field. Press the “Set” button and then “Ok” in all windows. Restart your computer;
3. Create a new paging file
The virtual memory discussed in the previous topic sits in a paging file. Over time this file can become defective and need to be replaced. You can do this in the same “Virtual Memory” window that you saw above.
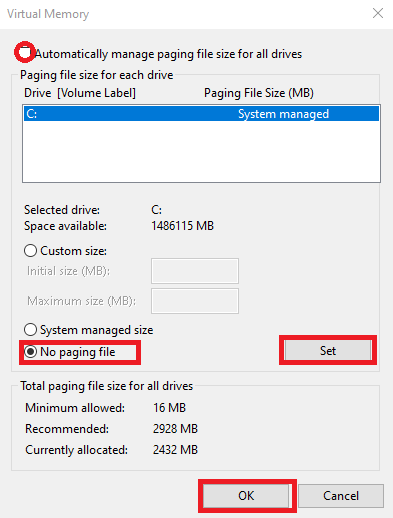
Step 1: Uncheck the box “Automatically manage the size of the paging file for all drives”, but this time select the box “No paging file”. Press the “Set” button, give “OK” in all windows, and restart the system;
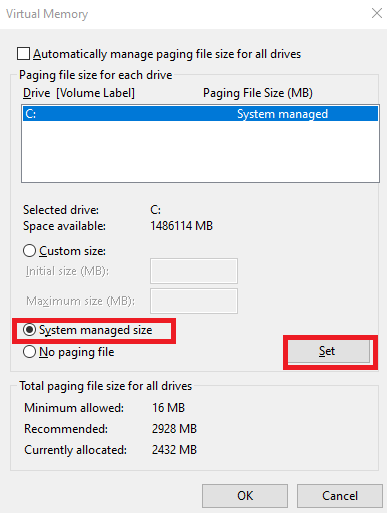
Step 2: After restarting Windows, open the “Virtual Memory” window again and check the “System Managed Size” box. Click “Set”;
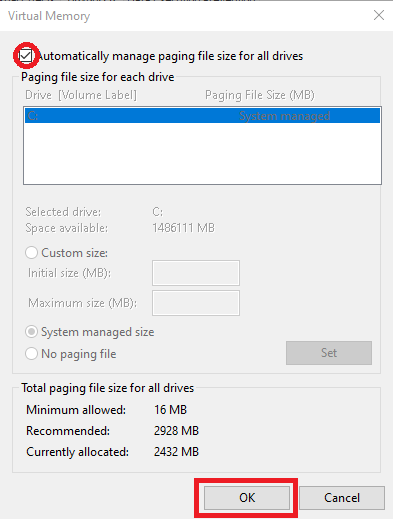
Step 3: finally re-check the box “Automatically manage paging file size for all drives”. Click “OK” and restart the system.
4. Fix Windows Search
There is a flaw in Windows Search that causes the search engine to loop, consuming system resources. If this is the problem on your PC, disabling the service will eliminate the overhead ending up with 100% disk usage.
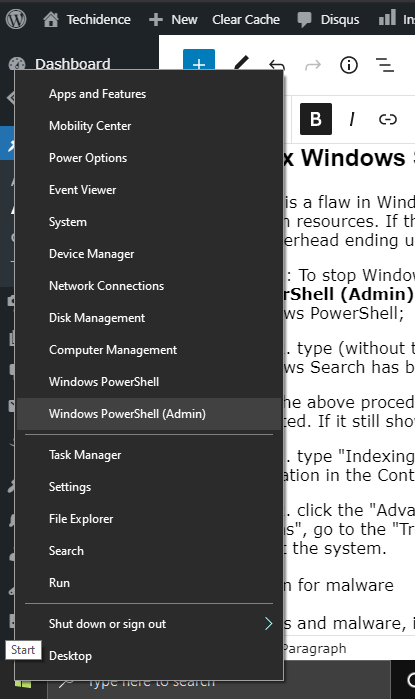
Step 1: To stop Windows Search, right-click on the Start button and select “Windows PowerShell (Admin)”. In the program run window, click “Yes” to confirm and open Windows PowerShell;
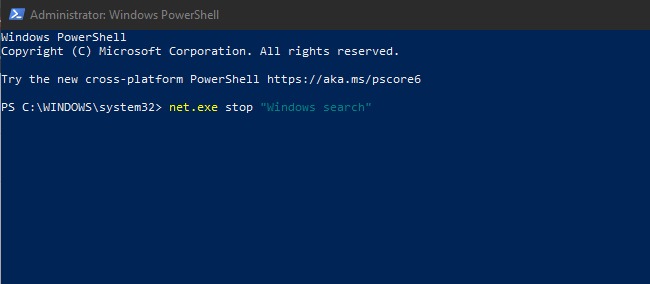
Step 2. type net.exe stop “Windows search” and hit enter. A message will appear informing you that Windows Search has been successfully terminated;
With the above procedure, Windows Search will start working again when the system is restarted. If it still shows the error, rebuild the indexing index of the search engine.
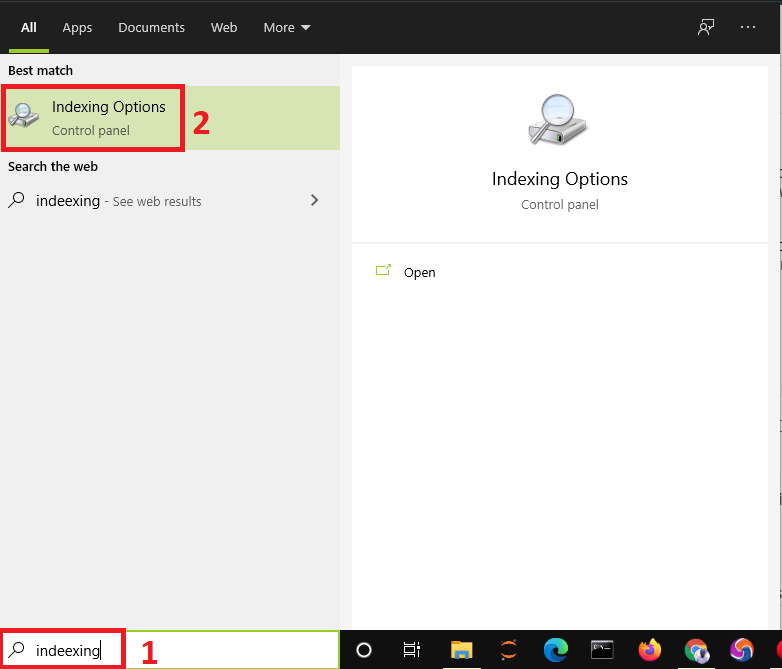
Step 1: type “Indexing” into the Windows 10 search field. Click on the “Indexing Options” application in the Control Panel;
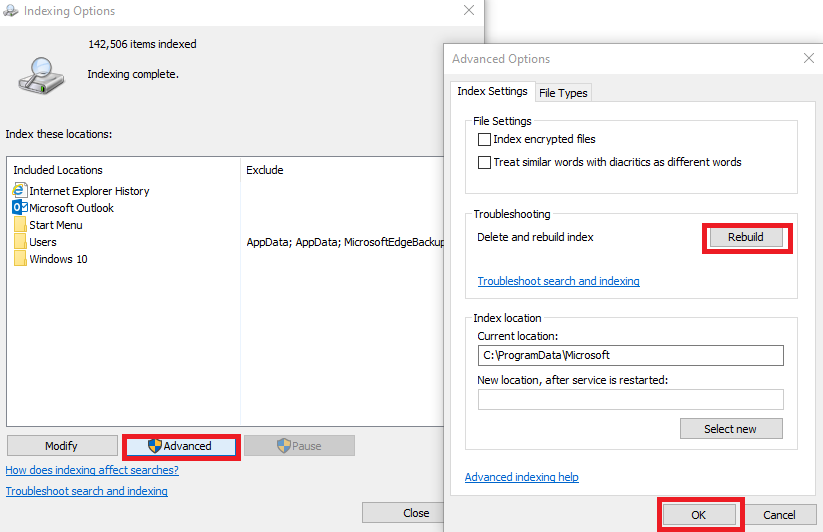
Step 2: click the “Advanced” button in the “Indexing Options” window Under “Advanced Options”, go to the “Troubleshoot” field and press the “Rebuild” button. Click “OK” and restart the system.
5. Scan for Malware
Viruses and malware, in general, can cause several performance problems on the PC, which also leads to a 100% disk usage error. Scan your system thoroughly for threats, and if found, eliminate them by following the software’s guidelines.
You can use free or paid antivirus software for this procedure. Software such as Malwarebytes Anti-Malware, AVG Antivirus, Avast Antivirus, and Kaspersky are good options and should solve the problem. Another alternative is to use Windows Defender, a Microsoft program that is already installed in Windows 10. To scan with it, follow these steps.
- Step 1: In the Windows 10 search field, type “Windows Security”. Click the option that appears at the top of the list;
- Step 2: Click on “Virus and threat protection”;
- Step 3: Enter and “Scan options”;
- Step 4: Select the “Full Scan” option and press the “Scan Now” button. Wait for the time it takes for Windows Defender to scan. In the end, eliminate the possible threats.
This post may contain affiliate links, which means that I may receive a commission if you make a purchase using these links. As an Amazon Associate, I earn from qualifying purchases.