

We are going to tell you the first steps to take after buying a new Apple Mac, whether it is an iMac or a Macbook, as it is a MacOS tour from the first time you turn it on. We will try to focus on the basic tips for users with less knowledge. There are other advanced things you can also do, although this will require more time, and today we look to take as little time as possible for you to start using the computer.
And in this case, each one of us is different and can have different processes. If there is any step or advice that you think should have been included in the list, do not hesitate to propose it in the comments section so that the rest of the community can also benefit from the knowledge of our techidents.
The first step: Your Apple ID
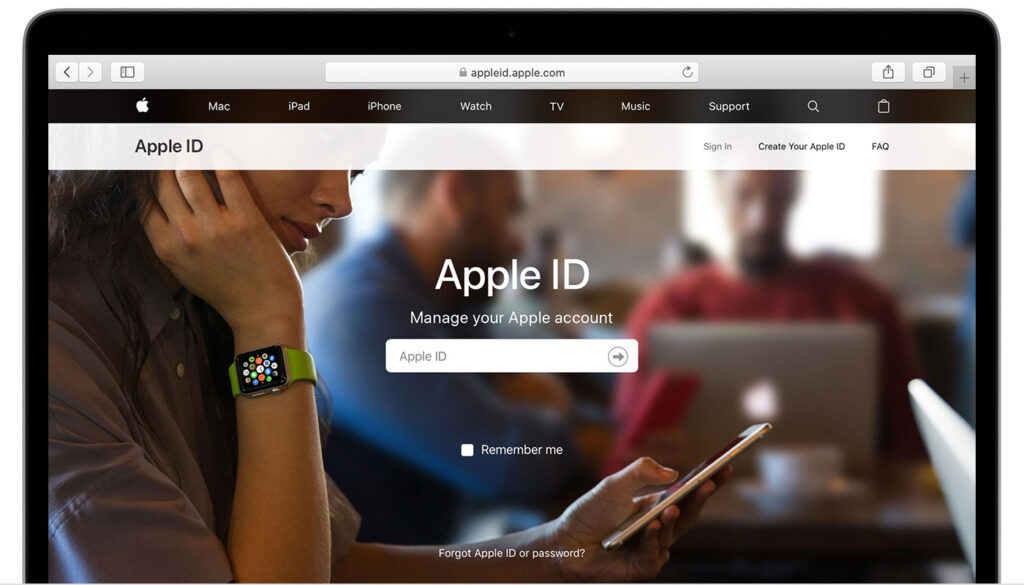
The first step you will have to take when you turn on your Mac and start making the initial configuration is to choose which Apple account you want to use. This account will serve as what is called Apple ID, an identifier that acts as your identity card within the ecosystem of devices of this company.
The Apple ID is where all your data will be centralized, using the space in the iCloud that is attached to it. In this way, all the settings on your device will be saved, and you will then be able to synchronize them with other devices or recover them if you reset yours or buy a new one.
Here, you have two ways to do it. On one hand, if you already have or have had other Apple devices, you can use the same Apple ID to synchronize your data, histories, browser bookmarks, photos, and to be able to link your devices. And if you’ve never had an Apple device before, you can create a new ID to centralize all your data and settings.
What you should take into account about your Apple ID is that you won’t be able to create it from scratch without relying on any other email as it happens with Google or Microsoft accounts. Here, even if you are going to create an email @icloud.com, you will need to use an external email to register your account.
When setting up your Apple ID the first time you start your Mac, I’ll give you a tip. Try not to activate the option to save Documents and Desktop in the cloud, because if you do, it is very likely that soon you will saturate all the default storage that iCloud gives you.
If you have Touch ID on your Mac, configure it

Entering passwords to log in is classic, but you are always limited to the strength of the password you have chosen. That’s why there is another quite interesting option that the latest Mac models have, which is to be able to set up Touch ID and unlock your computer using your fingerprint.
Touch ID can be configured during the initial configuration of macOS the first time you turn on your new Mac. But you can also do it later, or simply enter to edit or add more profiles for more fingerprints. To do this, click the Apple button on the top bar and enter the System Preferences, and enter Touch ID.
Once in the Touch ID settings, you’ll see the fingers you’ve configured. You can click Add a fingerprint to set up a new fingerprint to unlock the computer. By using Touch ID, you can decide what you can use your fingerprint for, and you can turn on or off the options.
Make your Mac as private as possible
Apple is a company that spends all its marketing to say how much it cares about your privacy, but at the same time, macOS is also an operating system that tries at all times to simplify everything as much as possible. This translates into few options to control your privacy since everything is set by default for many of your data to stay on the Mac and always share the minimum with Apple, although there are just the most important.
As the Internet is today what we use most on our computers, it is important to protect your privacy. Within the System Preferences, you have the Security and Privacy section where you can make various settings related to them. For example, in the General tab, you can change your login password, choose how often the computer is locked, and even if you want to log in with the Apple Watch. If you have it on your wrist unlocked, it will also unlock your Mac.
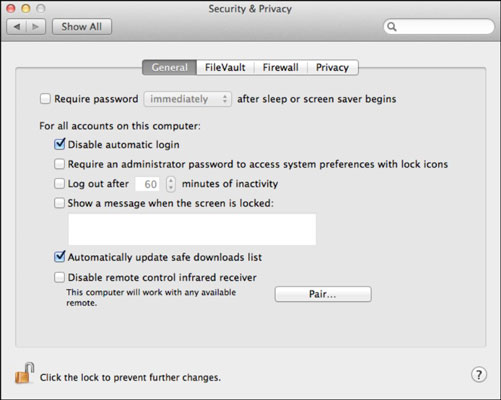
MacOS also offers you the ability to encrypt your entire operating system with FileVault. A priori, it is a very interesting option if you want to have your data as protected as possible. However, maybe having it activated from more headaches than anything else. Unless you save on your Mac data that is extremely private is not always recommended to activate FileVault, as it is another encryption password that you must memorize, and if you do not remember it your Mac may be blocked.
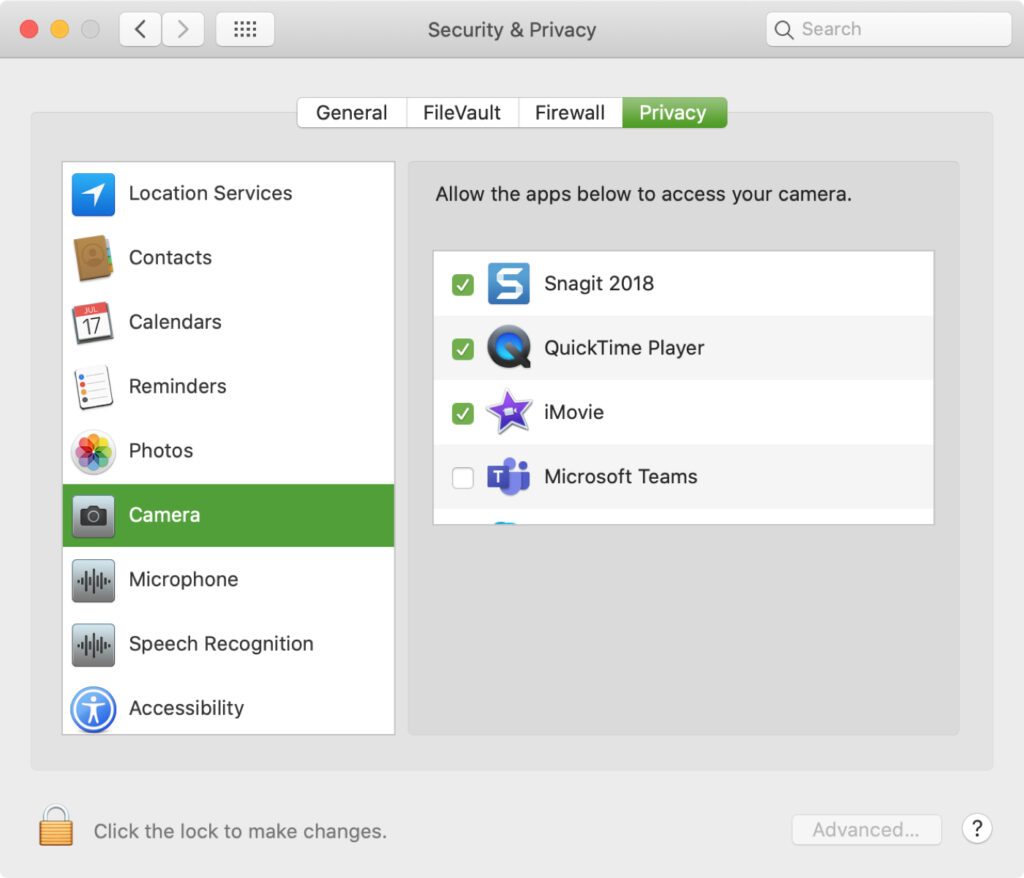
In Privacy Tab, you’ll also be able to manage access app permissions on your Mac, deciding which can access your location, camera, your photos, or your contacts among many other data. When you give permissions to the apps when you install them, you can come here and revoke the permissions you want, but always bear in mind that doing so may not work properly.
Within this privacy tab, also in the left column, under all permissions, you have two important privacy options. The first is the option of Advertising, which you can use to limit the tracking of ads. This means that a profile with your details will not be saved to show you personalized ads.
You also have the Analysis and Improvement option. This is a bit hidden, but with it, you will be able to decide what data you send to Apple about your device. With this data, Apple will improve their products, but you can always refuse to send what you say to Siri, the analysis of your iCloud, or data from your Mac.
Check for system or app updates
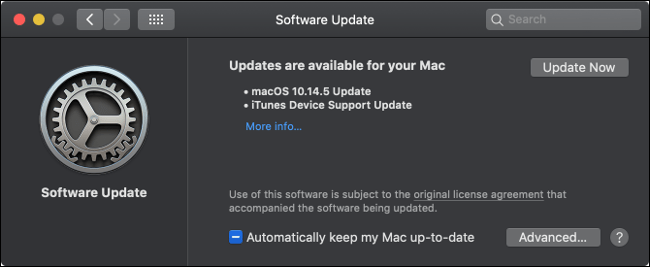
When you turn on a new computer for the first time, whatever its operating system, another first step is always to check for system updates. There will always be updates pending, so it’s important to check and comply with them before doing more serious things, as your version of macOS may have some vulnerability discovered and fixed in updates. Start by entering the System Preferences.
Once inside the System Preferences, click on the Software Update section. When you do, macOS will look for new updates, and if there are, you will have to click on the “Update Now” button to download and install them. Normally, some updates will require a restart of the Mac to apply them.
It is also convenient to check the application updates that you have updated on your Mac. To check it manually, you have to open the App Store, and once you’re inside, click on the Updates section you have in the left column. You will enter a section where you will see all that needs to be updated but usually updated alone.
Think about which browser you want to use
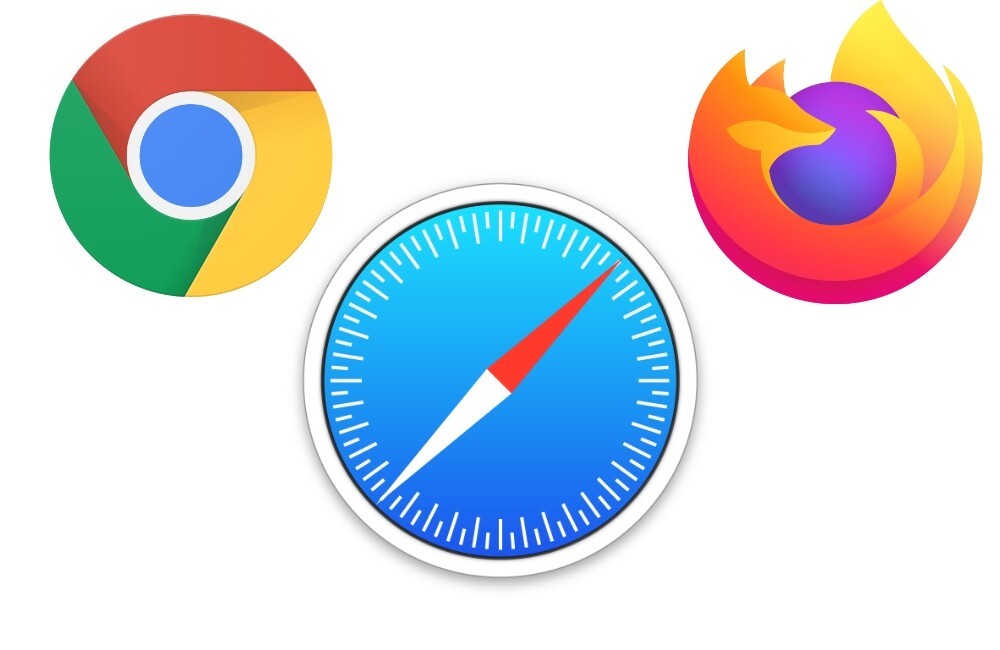
On your Mac, the pre-installed Internet browser will be Apple Safari. It is a very good browser and fast, and that comes with many features that care for your privacy. So much that many macOS users stay with this browser and do not even think about installing another.
But you may have gotten used to using Chrome, or you want to give a chance to other browsers like Microsoft Edge, which has a version for macOS, or a Mozilla Firefox that for years has specialized in performance and privacy protection.
And if you want to explore other options, you also have other equally interesting browsers that offer different experiences, from Vivaldi’s total customization to Opera’s versatility, to the privacy options of other alternatives such as Epic Privacy Browser. And there are many other alternative browsers you can try.
Start installing your apps and programs
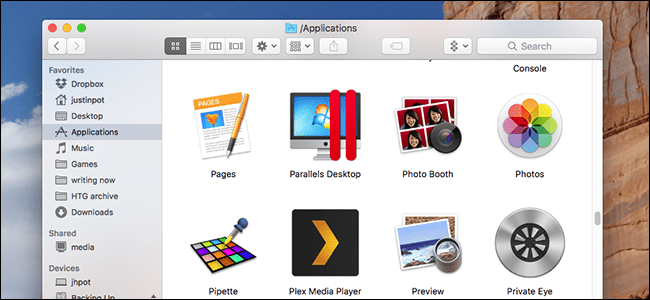
MacOS will not allow you to uninstall the applications that come pre-installed by Apple. However, if any of them do not convince you, you have hundreds of alternative applications that you can install on your computer.
You can also open the Apple App Store, where you can search for all installable macOS applications. You have them divided into categories, but there are also special sections of applications to create and work and a Discover section where Apple will suggest different applications.
And if you want to uninstall any of the applications you have on the Mac, is as easy as moving its icon directly to the trash. You can also open the Launchpad and hold down the Option key on your keyboard. When you do this, you’ll see an X on those applications that you can uninstall.
If you have an iPhone, you’ll have it synced
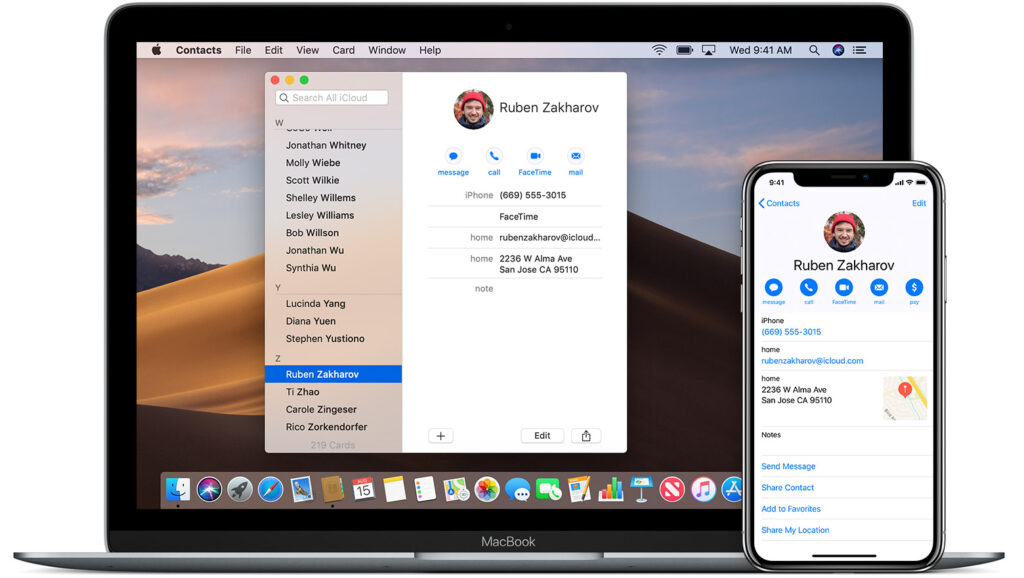
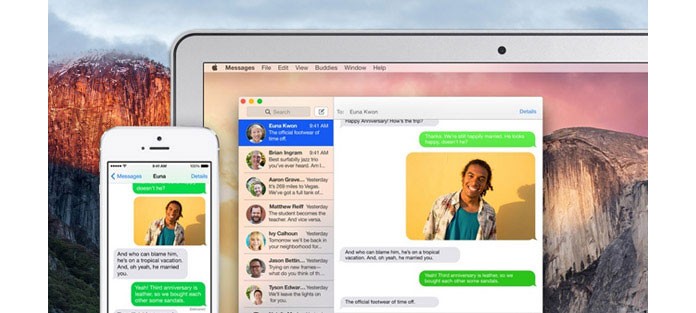
One thing to remember is that if you are already part of the Apple ecosystem you have many advantages. All because many native applications are synchronized between devices, so you can start some tasks or do specific things on the iPhone and continue with it or resume conversations on macOS.
A classic example is that the messages you send through iMessage, you will see on both devices. This means that if you’re chatting on your mobile, you’ll be able to see the conversations on your computer as well. These are pre-installed applications, so you don’t have to install anything. You’ll also have your photos, calendar, contacts, notes, calendar, and music synchronized, as well as bookmarks, history, and other Safari items.
You’ll also be able to make FaceTime calls like a phone call, but with video. In addition to this, through iCloud, you can also have your files synchronized between mobile and computer. All files you save in the iCloud section of the file browser on your Mac will automatically synchronize on the mobile, and the same will happen on the Mac with those you save in the iCloud folder on the iPhone.
And finally, you have the AirDrop function. This feature is native to all Apple devices and serves to share items between them without having to install anything else. For example, on the mobile go to the share option of the browser or any app, and among the options will be AirDrop, which will find your Mac, iPad, or other iPhones around to send them directly the content without needing any specific app for it.
About the Finder and iCloud
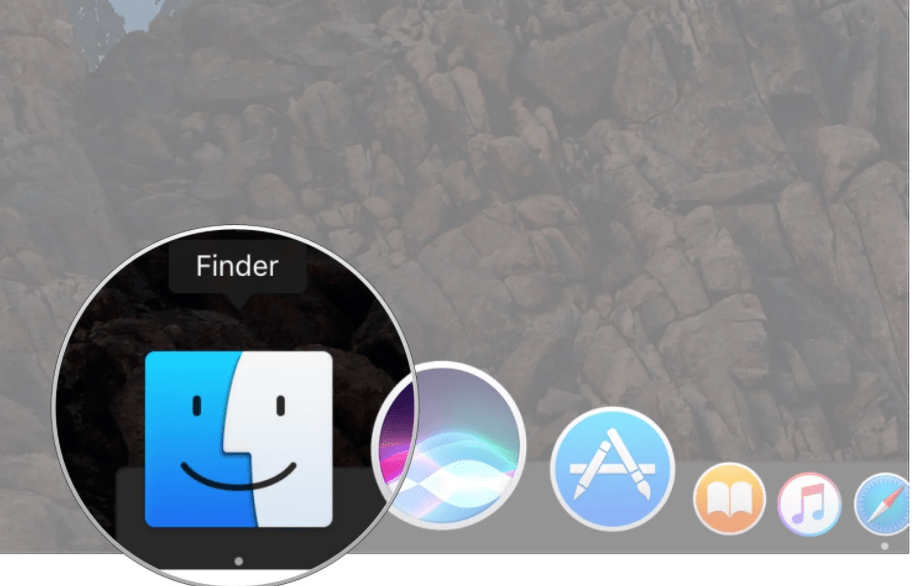
And since we have mentioned the macOS file browser, which is the Finder, we will tell you some things that if you are a first-time user you should know. This is where you can access the files you have on your Mac, both in iCloud and in the internal memory of your device. Everything is computer in the left column, which is where you have to go by clicking to enter the different sections.
Here, a section within the Finder called Applications should be highlighted. In it, you can see all the apps you have on your Mac and manage them easily. You can uninstall the applications from here just take them to the trash, and all the new ones you install will also be added.

Other folders in the favorites section of the Finder are Recent, which will mix the files you’ve recently used on your Mac locally or in iCloud. In Desktop, you’ll see the items you have on your desktop, and in Downloads, you’ll see the files you’ve downloaded. To explore the rest of the hard drive, you’ll need to use the shortcut Command (⌘) + Shift (⇧) + C inside the Finder, and if you want to see the hidden folders as well, use Command (⌘) + Shift (⇧) + Dot (.)
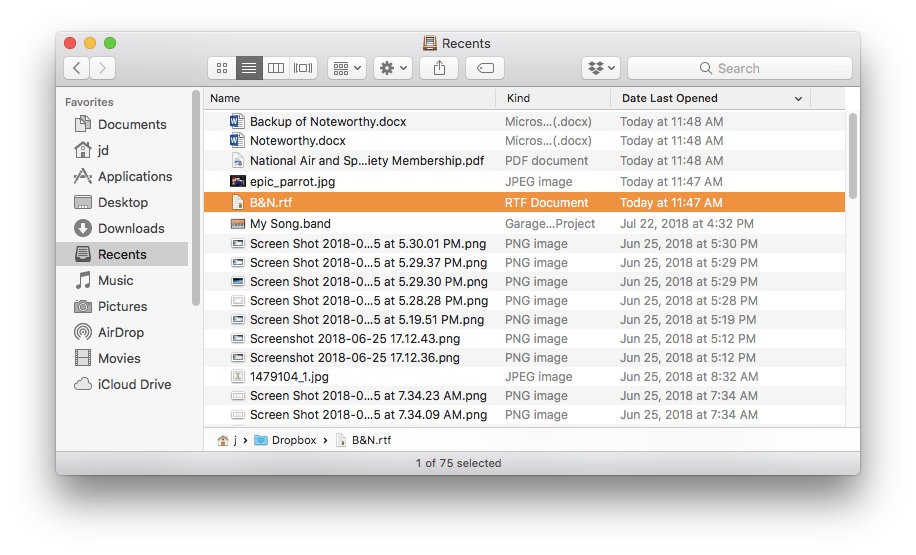
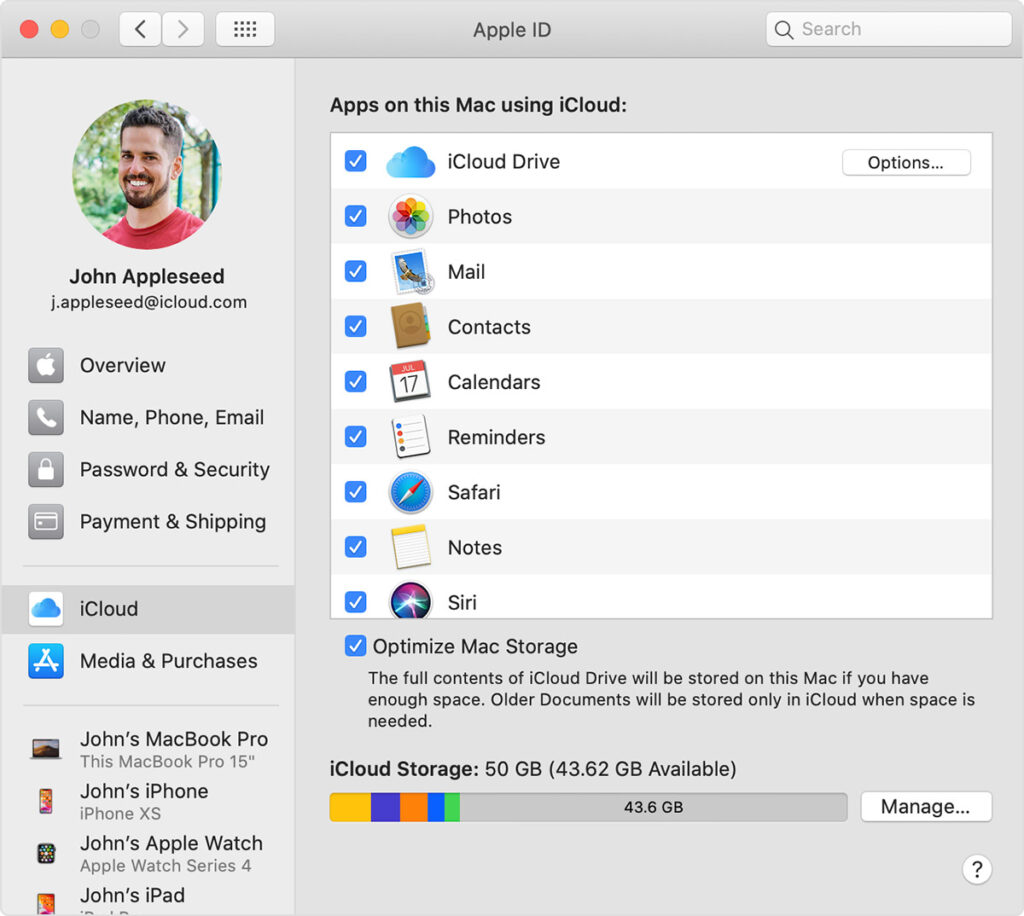
One thing you should be careful with is the iCloud folder since everything you put into it will take up space in the cloud, while the elements of the other folders in the Finder will take up space on your Mac. The cloud is important to recommend because the free version of iCloud only offers 5 GB, so if you want to use more to synchronize your photos or have large files shared between devices, you’ll have to buy more storage.
Customize macOS to your preference
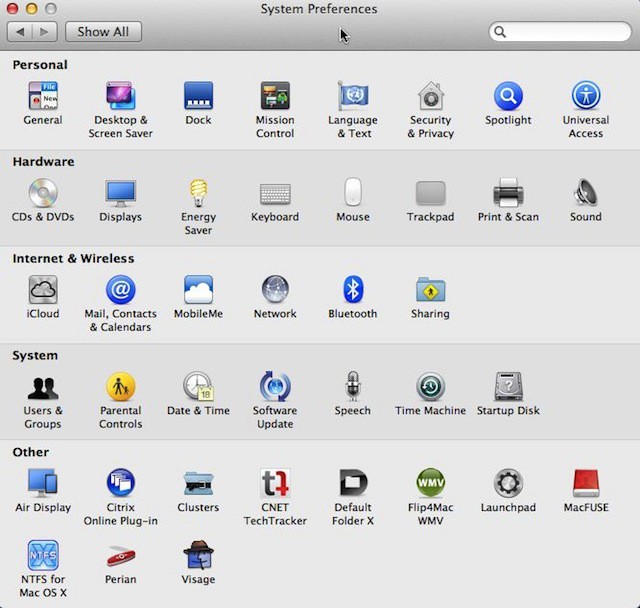
Now we come to an important part, that of slightly customizing macOS to suit your taste. And I say slightly because there are not too many options to customize it, but enough to give it a facelift. The first you have in the General section of the System Preferences, where you can change its appearance by alternating between light and dark themes, and several of its colors, bars, and other aspects.
In the Desktop and screensavers section, you can change the background of your Mac and put a screensaver. In the wallpaper, you can look at the dynamics that have two aspects that alternate when you use the light or dark mode. You can also use your photos as wallpapers.
You can also customize the dock with the Dock section of the System Preferences, changing its position or size. There are also other options such as automatically hiding the Dock, showing recent applications, or disabling aperture animations. Besides, when you open an app you can also put it on the left side of this lower dock to leave it docked.
There are other aspects of the preferences that you can also change, such as what type of results you want Spotlight to show, adding payment cards, or the notification layout. Spend as much time as you need to get everything just right. You can also add new Internet accounts, such as the one you use from Google or Microsoft, to synchronize calendars, contacts, emails, and other applications.
Power and Sleep Settings
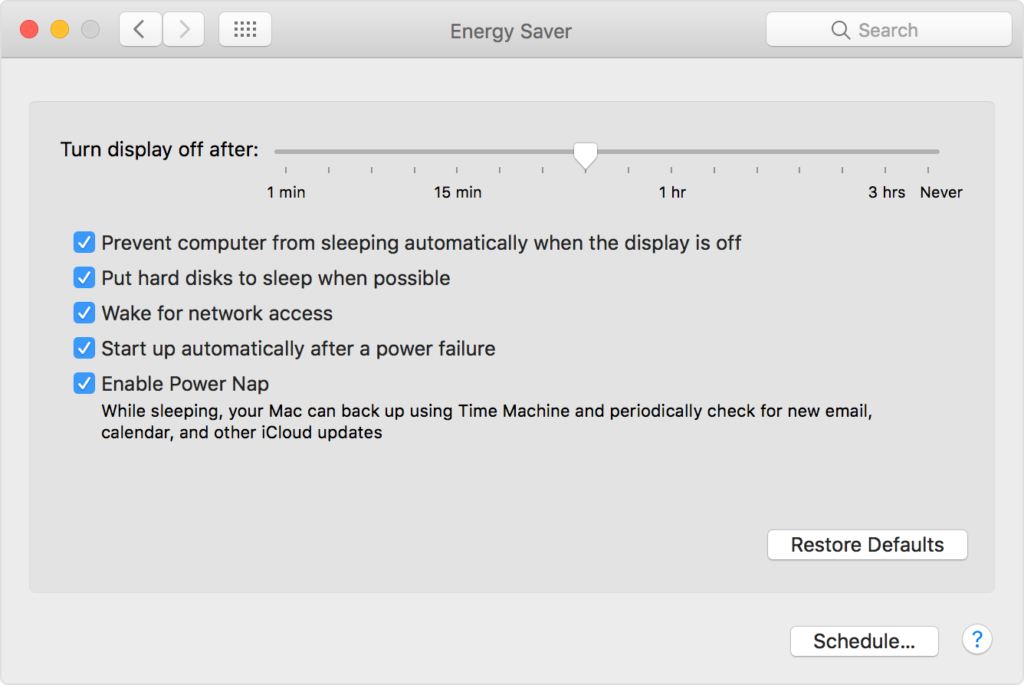
When you start your computer, and you go away for half an hour to do something, and when you come back, you find it turned off or suspended. That’s why it’s also advisable that as soon as you start doing it right away, you set up its power and sleep management to suit you. To do this, you must enter the System Preferences, and once inside, go to the Economizer section.
Here you will have two tabs, the Battery tab, and the Power Adapter tab. What these two tabs do is allow you to make different settings for when you have the Mac plugged in or is using the battery without plugging in. In each of them, you can set when to turn off the screen when you have not used the Mac for a certain time.
You can also set other settings, such as forcing the computer not to enter sleep after turning off the screen or disabling the options for the hard drives to enter sleep. You also have a Schedule option to set automatic startup and shutdown at certain times of the day. You know so that when you get up in the morning, the Mac is on, and it always shut down at night.
Consider making backups
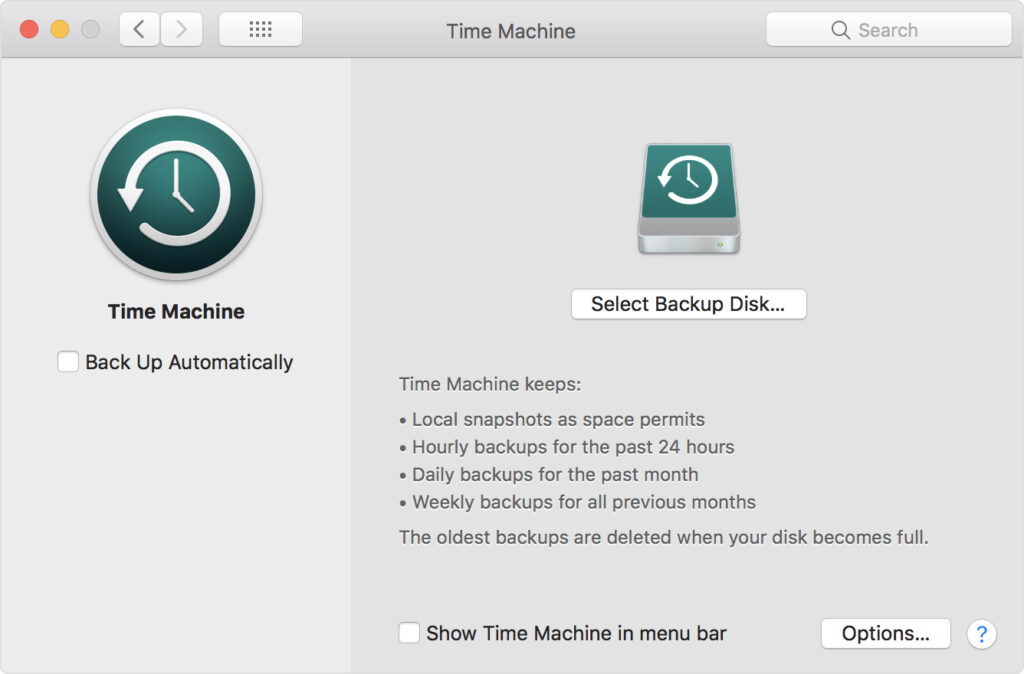
And after having spent so much time doing all this in your first hours with your new computer, it would be a shame if some mistake made you lose everything, right? To prevent this, the best thing to do is to make backups with the Time Machine function, so that you can make sure that everything is recovered if something goes wrong.
As for files, you can synchronize a lot of data through iCloud, such as your photos, documents, calendars, contacts, etc. If you are going to synchronize files, and especially if you intend to synchronize your photos, you will probably need to buy more space in iCloud, since free space is insufficient.
This post may contain affiliate links, which means that I may receive a commission if you make a purchase using these links. As an Amazon Associate, I earn from qualifying purchases.