

WhatsApp may have a kind of bug that may stop it from receiving messages until the app is opened. The error can occur due to issues with some phone settings, such as the battery-saving function. It is also possible that Internet connection failures or apps that are supposed to improve Android’s performance may delay the notification receipt.
In the list below, Techidence presents 5 tips to solve the WhatsApp problem that only receives messages when the app is opened. You can check out some solutions to modify smartphone settings, which should be enough to fix the malfunction.
1. Check if the phone is in battery-saving mode
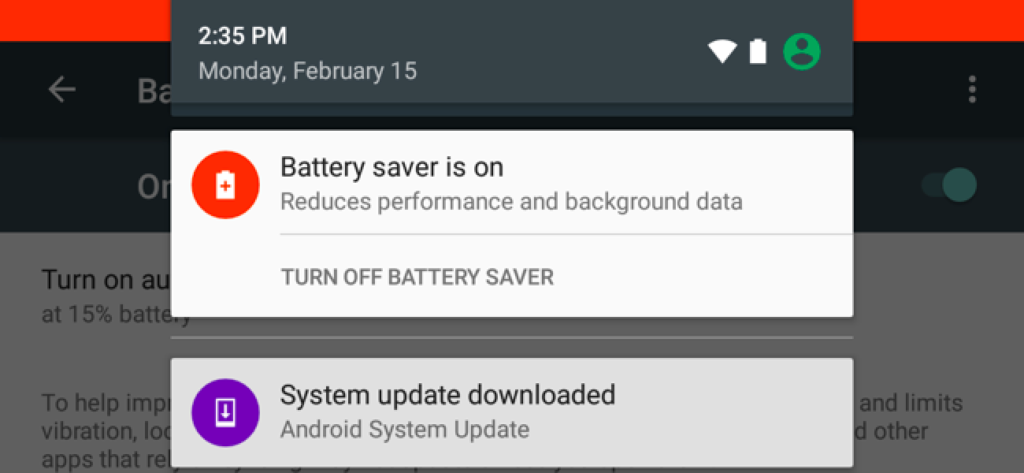
The latest mobile phones usually come with factory-activated battery-saving settings to improve smartphone battery life when the power level is low. However, the feature can block some phone functions, such as background app activities, or even disable the Internet connection.
When WhatsApp stops working in the background, it will not be able to send notifications when it is closed, so the user can only see new messages when the application is opened. Therefore, it is important to check if the saving mode is activated. If it is, the idea is to disable the feature to try to solve the problem.
To do this, go to the phone settings and touch the “Battery” tab. Then look for the “Battery Saver” option and select it. From there, you can know if the feature is activated, so you can turn the option off.
2. Check if WhatsApp is not set to Background Stop
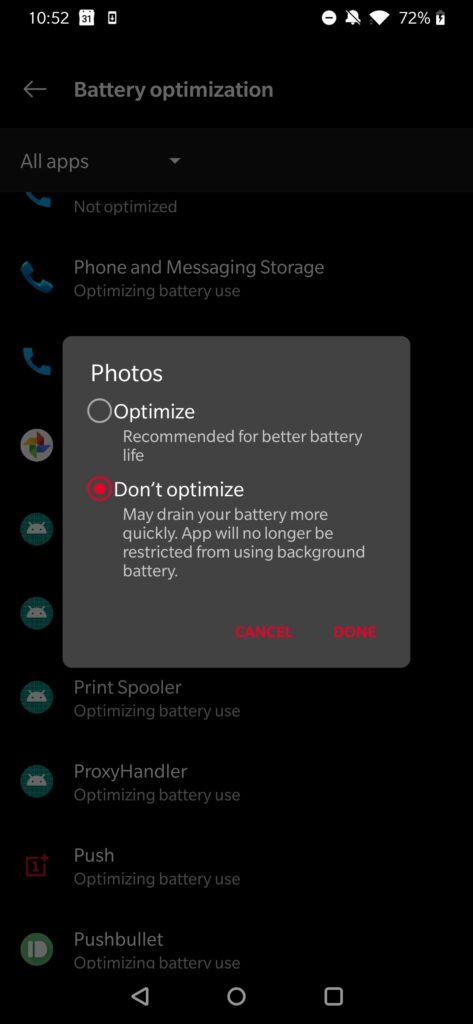
As a way to prolong battery life, it is common for Android to suspend the activities of apps that are running in the background. Therefore, there is a delay in receiving WhatsApp notifications when the app is set up to optimize the smartphone battery.
However, it is possible to modify this feature in the phone settings, and you can select which apps you want to “Optimize” and “Don’t optimize”. The functions have their pros and cons, as by “Optimize” you prolong the use of the smartphone battery, but as a result, you block apps functions in the background. And, by “Don’t optimize”, the cell phone battery may drain faster, but the applications will continue to work normally.
3. Enable Background Data Usage for WhatsApp
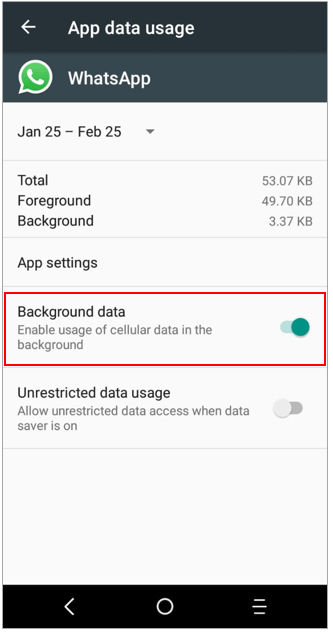
WhatsApp can also stop sending notifications when in the background because it does not have a stable Wi-Fi connection. So enabling mobile data usage in the background can also be important to keep the application running even when you don’t have it open. This way, notifications will continue to come in real-time for you.
To do this, go to the device settings and touch the “Apps” option. Then, search through WhatsApp and open messenger. Under “Mobile Data and Wi-Fi”, tap the switch next to “Background Data” to activate the feature.
4. Restart the Phone
Sometimes restarting the device is enough to solve the problem. It is also possible that notifications are not coming because of bad Internet connections. In this case, it is recommended to check if Wi-Fi is connected or if mobile data is active. It is also worth exchanging one connection for another and check if they are working by doing a web search, for example. Then turn off the smartphone, wait 30 seconds, and turn on the phone again to see if the problem has been corrected.
5. Uninstall Performance Improvement Apps
Performance-enhancing apps give preference to battery life and promise to improve Android’s autonomy, forcing applications running in the background to stop. By preventing WhatsApp from continuing to run while it is closed, this type of app also prevents notifications from coming in when the messenger is not open.
To uninstall an application on Android, go to the phone settings and tap on “Apps”. Search for the performance boost app you have installed and tap on the icon. Then touch “Uninstall”. Restart the device and confirm if the problem has been solved.
This post may contain affiliate links, which means that I may receive a commission if you make a purchase using these links. As an Amazon Associate, I earn from qualifying purchases.