

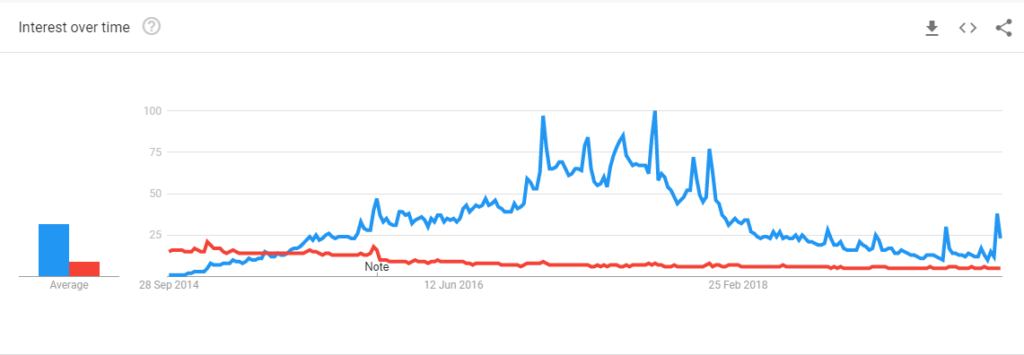
The streaming media application is eating the toast of the video player par excellence. Google Trends data shows this, with a downward trend in the player from 2014 to now. What does Kodi have that VLC doesn’t? Why is everyone opting for the latter over VLC to watch series and movies? See below.
What is Kodi?
Unlike VLC Player, Kodi does not limit its functions to a simple media player. The application itself is called a media center where you can play any content on-demand, either from the Internet or through local video files. So far the differences with VLC are minimal. Kodi’s raison d’être has to do with Addons.
We could define Addons as small Kodi plug-ins that can be used to extend the list shown by the application, as well as the services it includes. From YouTube and Plex to Spotify, including international radio stations, TV channels from other countries and the best of all: movies and series on demand.
Like any on-demand service, Kodi classifies its list as if it were an official streaming service. So, with the right tools and accessories, you can watch any film, series or TV channel from the comfort of your armchair without having to resort to pages of dubious quality or intrusive advertising spaces.
Another advantage of the application concerning VLC is its compatibility with any operating system. As it is open-source software, the application supports installation on Windows, Linux, macOS, Android, Blackberry OS, and iOS computers, although it is more popular on systems based on Raspberry OS because of its compatibility with televisions.
It also supports the sending of content through Google Chromecast, which is an ideal way to broadcast images from a mobile phone or tablet.
Read: Telegram vs WhatsApp: Similarities and Differences in 2019
How to Install Addons on Kodi through Official Repositories
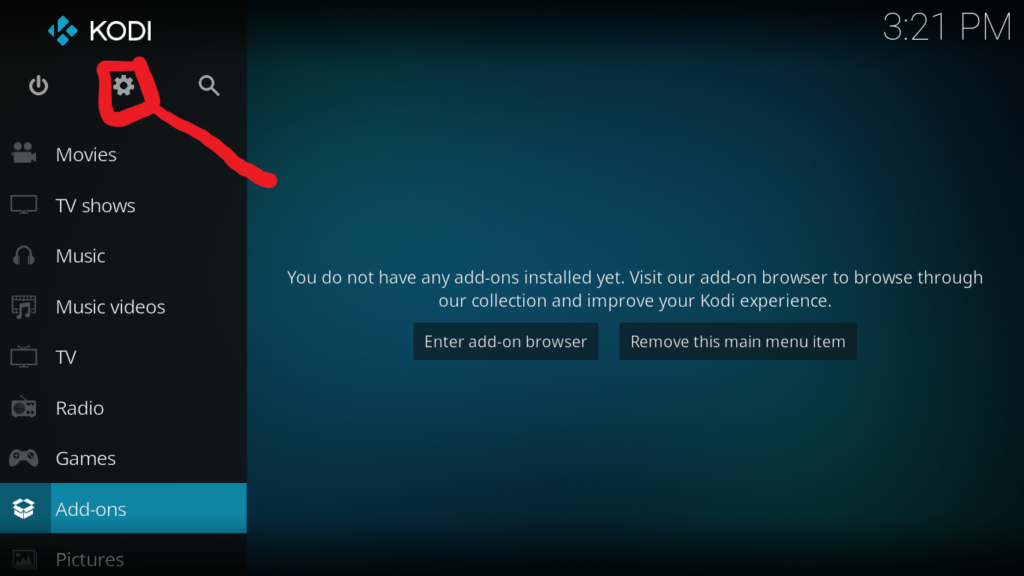
The installation of an Addon in Kodi can be carried out through two methods: through official repositories or external sources. In the first case, the process is as simple as clicking on the “Settings” then click on “Add-ons”.
Once inside, click on the “Install from Repository”. Then, the application will show you a library of add-ons classified by type of content: music add-ons, video add-ons, third-party applications… Even official applications such as Spotify or YouTube.
Once you have chosen the type of add-on to be installed, select the add-on in question and click on Install. It will be automatically installed in the application.
How to Install Add-ons on Kodi from External Resource
The great advantage of Kodi is that it supports the installation of add-ons from external sources, which can be found on many websites. The way to proceed in this case is somewhat different from the previous one.
First, you have to go to the application’s setting through the cogwheel on the top bar that is shown on the main screen. Once inside, you will go to the “System” section and finally to “Addons”.
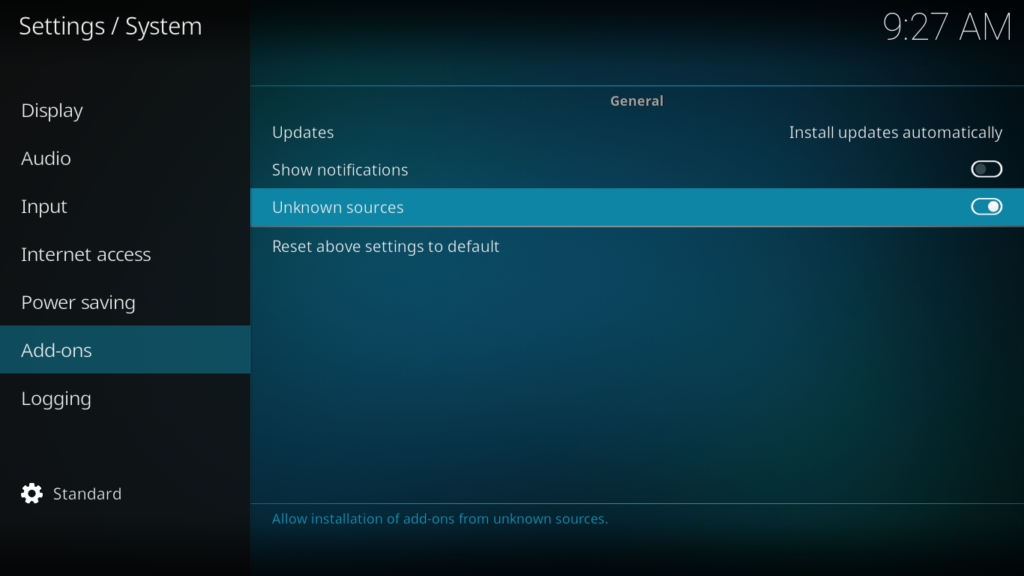
Within this option, we will enable the Unknown Sources box to activate the installation of unofficial source plug-ins. To install an Addon from a ZIP file you will go back to the Kodi settings again and select “Addons”.
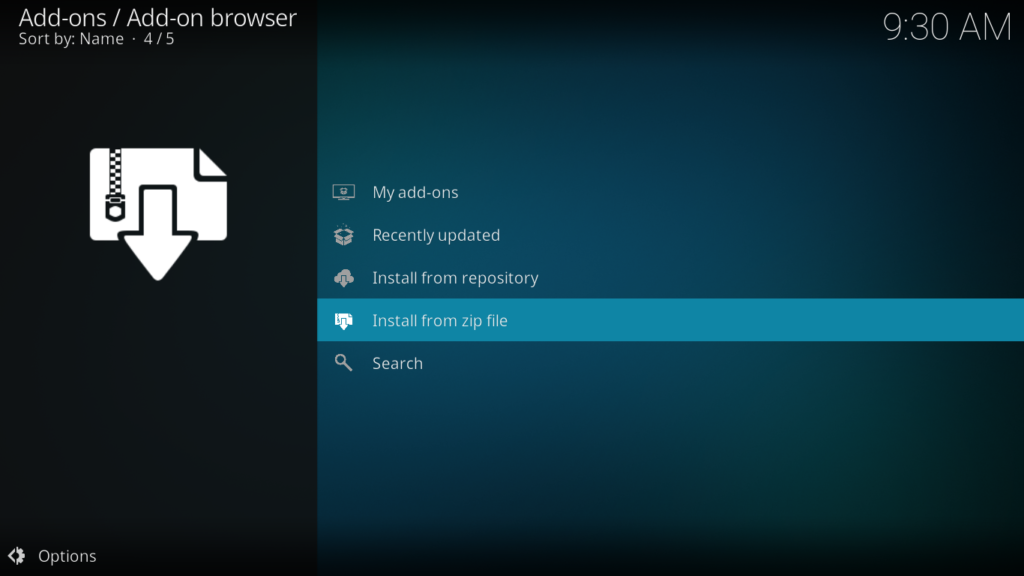
Finally, we will click on Install from a ZIP file and select the file in question to install.
The Best Kodi Add-ons for 2020
- Adriana Europe
- Alfa
- Alvin
- Aragon Live
- Area 51
- At The Flix
- Atlantis
- Bassfox
- Bob Unleashed
- Bone Crusher Reborn
- cCloud
- cCloud TV
- Cerebro TV
- Chucky 2
- Chucky Video
- Cine
- Colombia TV
- Come At Me Bro
- Convenant
- Cypher Media
- Daja Vu
- Death Streams
- DeathStar
- Disko Kosmiko
- Documentary Empire
- Einthusan
- El Rincón del Terror
- Electron
- Empire
- End-Zone
- Enigma
- Entertainment Time
- Exodus Redux
- Explora
- Extreme Sports
- Fantastic
- FEN
- Festa
- Fitness Zone
- Football Replays
- Fusion.org
- Genesis Reborn
- Golden Latino
- Grub Hub
- HD Movies Trailers
- IPTV Bonanza
- IT
- Junior
- Legion Final Absolution
- Live Hub
- Live TV Serbia
- Loki
- Los Duros
- Luxray Video
- Magellan
- Magic Dragon
- MagyckPi
- Maverick TV
- MaverickTV
- Mercury
- METV
- Microsoft Virtual Academy
- Mirror Video
- MMA
- Motor Replays
- Movie Theater Butter
- MoviesPR
- Mundo Cine
- Mundo Dragon Ball 2.0
- Mundo Infantil
- Musicando
- Neptune Rising
- Next
- Nole Cinema
- Not Sure
- Numbers
- Oculus
- Original Genesis
- Palantir
- Pavoo TV
- Pequelandia
- Pigskin
- Placenta
- Planet MMA
- Planeta
- Playlist Loader
- Plexus
- Proto IPTV
- Proyeck Motors
- Pure Sports
- Quantum
- Quasar
- RaceTV Turbo
- Redemption
- Release BB
- RS IPTV
- RT
- Scrubs V2
- Secret IPTV VIP
- Self Help
- SJ Justicia
- SportsDevil
- Spotify
- Sr. Regio
- Strike’s Movie Zone
- Supermospy TV
- Survivor
- TechStreams Free-For-All
- Tecno TV
- Tempest
- The Crew
- The Dark Knight
- The Loop
- TinklePad
- Troma Films
- Tubi TV
- TV Chopo
- tvOne
- Ultra Instinct
- Ultra IPTV
- Universe HD
- Venom
- Versions of Destiny
- Voodoo
- World TV
- Wrestling On Demand
- X Games
- Xtreme Wilderness
- Yankieflix
- YouTube
Also Read: How to Know If Someone Have Access To Your Google Account
How to Change the Theme and Appearance of Kodi
Kodi supports the installation of own and third-party themes through the application options. Go to “Settings” then click on “Interface”, click on “Skin” and then on the option with the same name. The application will then show a list of predefined themes, as well as the option to add other ones through external sources.
In case you want to change the colors, the font or the size of the interface, you can use the options shown in the same section of Skin. If you go to the Screen Saver section, you can choose an image that will be displayed when Kodi is in standby.
Adding RSS News to Kodi
As a good multimedia center, Kodi has news integration through the RSS standard. The option in question can be found in the same section of Skin within Interface.
Once inside, enable RSS news. Then, click on the Edit button that will appear after its activation and will automatically download an Addon called RSS Reader.
After this, click on the Add button and add all the news sources that are of interest. These will start to be displayed on the main screen of Kodi as in any RSS reader.
How to Create Users Profile on Kodi
If the application is to be used by two or more people, the best way to divide the content is to create user profiles. In the Kodi settings, there is a section with the same name. We only have to select “Profiles” and then “Add profile”.
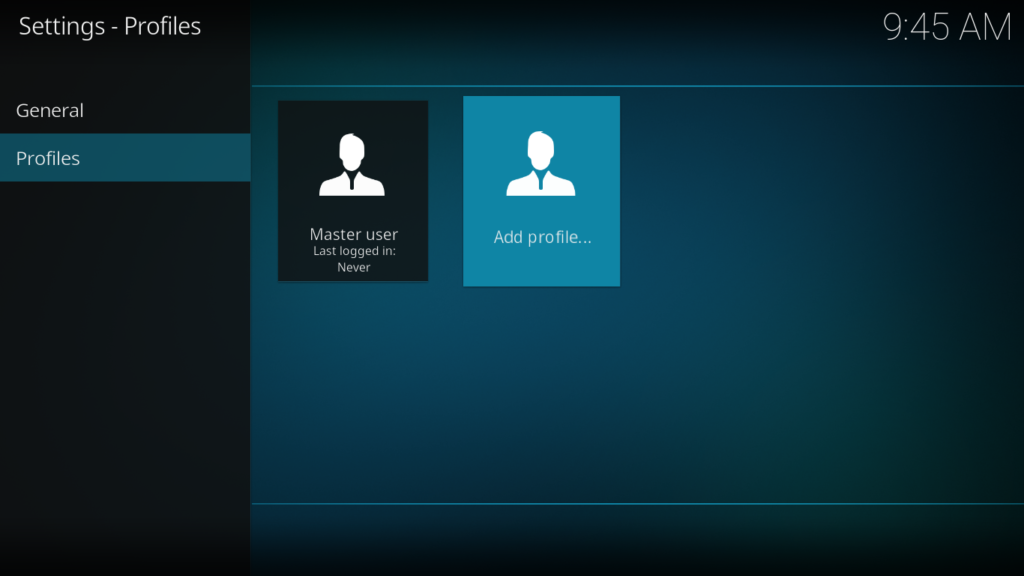
Finally, we will indicate the name and the folder inside the storage root, folder where all the data related to the content will be stored (Addons, RSS feeds…).
How to Add Subtitles in Kodi
One of the great advantages of VLC is its ease of adding subtitles. As a good media center, Kodi integrates this function natively, although we will have to rely on external sources for this.
The process to follow in this case is very similar to the previous ones. First, you will have to access Kodi settings through the cogwheel on the main page and then click on “Player”. In the Language section, click on the Preferred subtitle language and choose English, French or any language that best suits you.
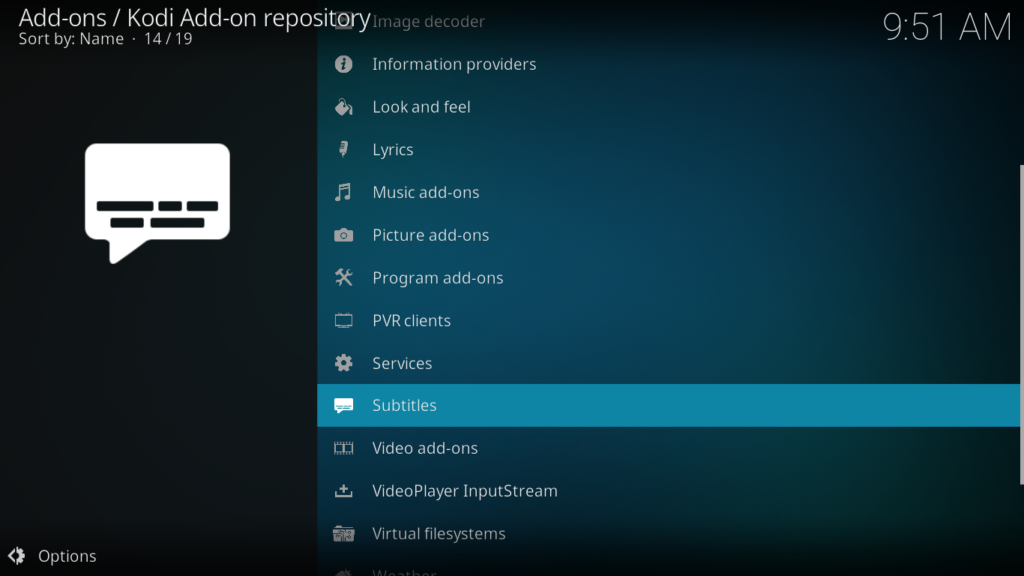
The next step in adding external subtitle sources is to go back to the Addons section. In “Install from repository” choose the Subtitles option and finally choose some of the sources that Kodi shows by default.
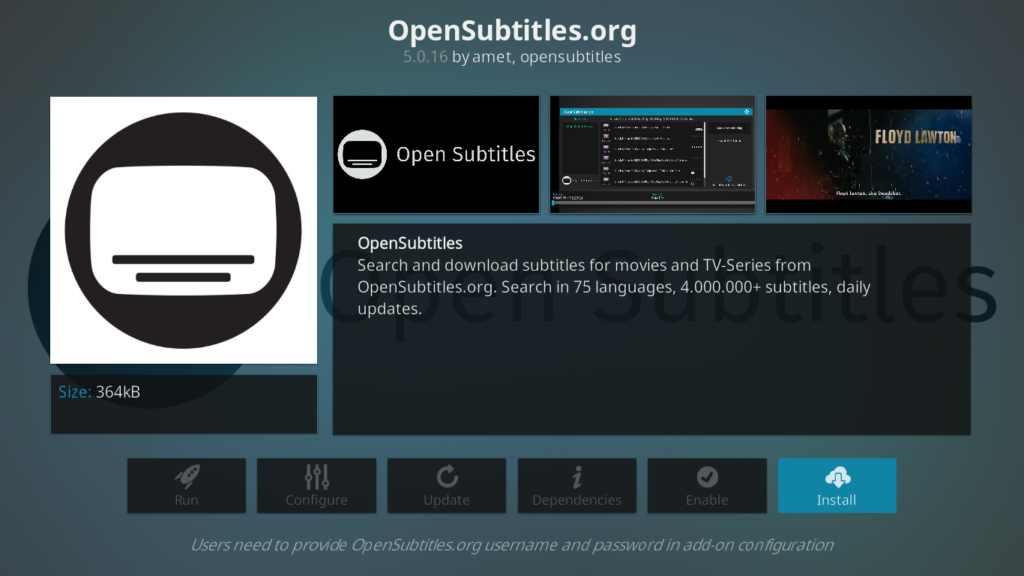
Our recommendation is to use sources such as Subdivx, OpenSubtitles or Addic7ed, although you can choose any of the options. The best is to choose several to have more possibilities when downloading a certain subtitle file.
This post may contain affiliate links, which means that I may receive a commission if you make a purchase using these links. As an Amazon Associate, I earn from qualifying purchases.