

There is no magic button to help us improve the speed of our computer. The different performance problems that computers can have can be due to a multitude of factors. The solution to most of these problems is to format the hard disk to avoid hardware problems. In the most extreme cases, replacing or upgrading certain components is usually an effective yet economical solution. In this case, we have made a compilation of several methods to improve the speed of the laptop without leaving our wallet behind.
A Full Hard Drive
And this applies to any type of memory. It is a fact that the higher the percentage of usage, the longer it will take the hard disk to find certain files in its records.
In this sense, programs such as Ccleaner or Windows’ Disk Space Saver can be useful if you want to remove unnecessary files from your computer. You can also choose to uninstall games and applications that you no longer use.
Depending on the capacity of the hard disk, the recommended minimum space is approximately 15 or 20 GB. This also applies to the Desktop. As it is an active folder, having its data available as much as possible will help us to improve the opening of certain applications.
Formatting Won’t Help If you Have A Mechanical Hard Drive
If the computer has a mechanical hard disk, the margin of improvement is practically derisory, since they have very low reading and writing speeds (between 80 and 100 MB/s in the best cases). Before investing time in formatting Windows 10, we recommend that you make use of solid-state memory, also known as SSD or SSD storage.
At Amazon, we can find models of 120 GB, 240 GB, 480 GB, 960 GB, and 1.92 TB for $24.99, $33.83, $48.99, $96.96, and $199.99, respectively if the interface of the computer is SATA3. The installation process depends on the laptop model, although it usually takes no more than 10 minutes.
Intel Extreme Tuning Utility: The Tool that Helps Increase Your Laptop’s Performance
It is a program developed by Intel itself to expand the possibilities of its processors. The interesting thing about this tool is that it has a function that allows users to eliminate the time restriction of the Turbo Boost function that Intel applies to avoid overheating. In other words, the program will allow users to work with the processor at the turbo frequency supported constantly if we indicate it. To avoid problems in the future, from techidence.com we recommend you watch that the temperatures do not exceed 90º C.
Forget About Antivirus, Use Windows Defender
The impact of anti-viruses on low-resource computers is well known. Although the use of antivirus is recommended for users with little experience in Web browsing, the truth is that Windows Defender has become renowned in recent years as one of the most effective methods against viruses and threats.
As it is the native antivirus of Windows, its operation is much more optimized than the rest of the options on the market. There are also tools such as Malwarebytes to carry out a specific test on the computer.
Disabling Windows Visual Effects Can Help
If you have a computer that is somewhat limited in capabilities, turning off the visual effects can be a good way to give it a boost when processing certain interfaces. To find this setting you will have to go to the System tab which can be found by right-clicking on the Windows Start icon.
Next, we will click on Advanced system configuration and later on Advanced options. Finally, click on Performance and finally on Settings.
Now we will only have to play with the different options of the Windows interface to optimize the system animations. To save the settings, first, click on Apply and then on OK.
Stop Programs That Run on Startup
With the installation of certain programs, the Windows startup process will slow down as time goes by. This is because some applications enable by default the automatic opening of processes when we log on to the computer. We are talking about programs like Spotify, WhatsApp, Telegram, Skype, and Slack.
To disable all these programs at startup right-click on the bottom bar of Windows. Then select “Task Manager” and then “More Details”. Finally, click on “Startup” to see the list of programs that run when Windows starts, as you can see in the following image:
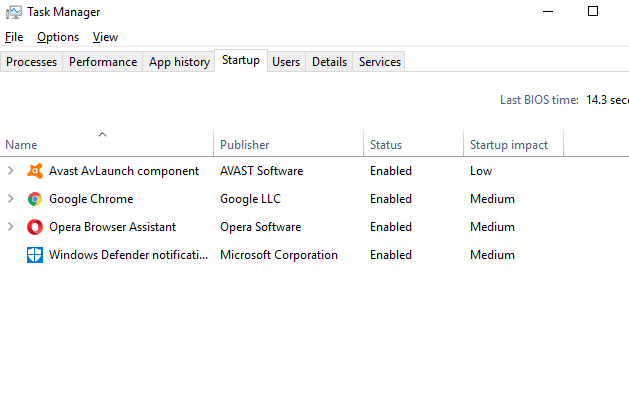
To disable these programs we will only have to right-click on the process in question and click on Disable.
Activate Fast Startup if your Computer Starts Too Slow
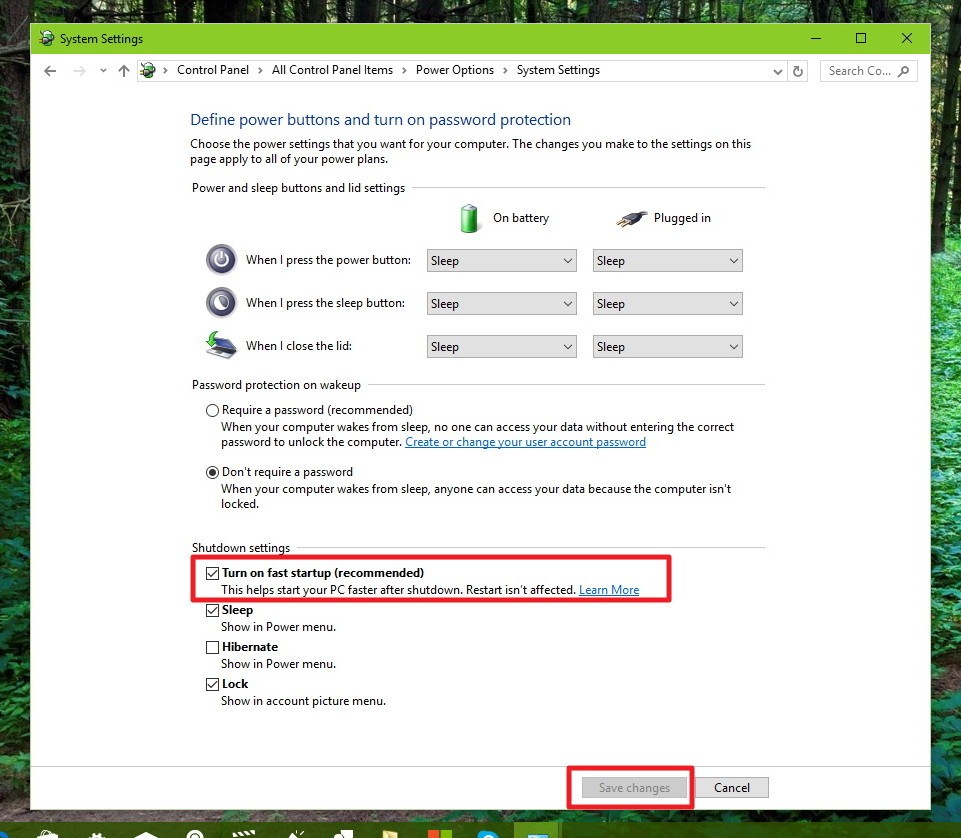
Although installing an SSD on the computer is the easiest solution, Windows has a feature that allows us to speed up the system startup on slow hard disks. We can find this option in the Power Options section, which we can find through the Windows Native Search Engine. Within this menu, click on Choose the behavior of the start and stop buttons, and later on, Change the settings currently not available.
Finally, activate the checkbox with the name Enable Fast Startup to enable Windows Fast Startup. To save the settings click on “Apply and Save”.
Delete Temporary Files
It is practically impossible to avoid the accumulation of files from past installations or residual documents from badly uninstalled programs. Although they do not pose a danger to your computer, they can affect the performance of Windows when running certain tasks.
Fortunately, Windows 10 has a problem solver that you will find inside the “Control Panel” or through the search box. This option performs maintenance tasks to free up disk space.
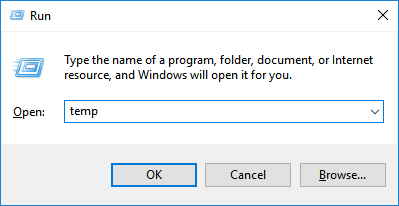
You can easily go through the shortcut by pressing together “Windows button” and “R”, then type “temp” and “OK”.
Deactivate Cortana
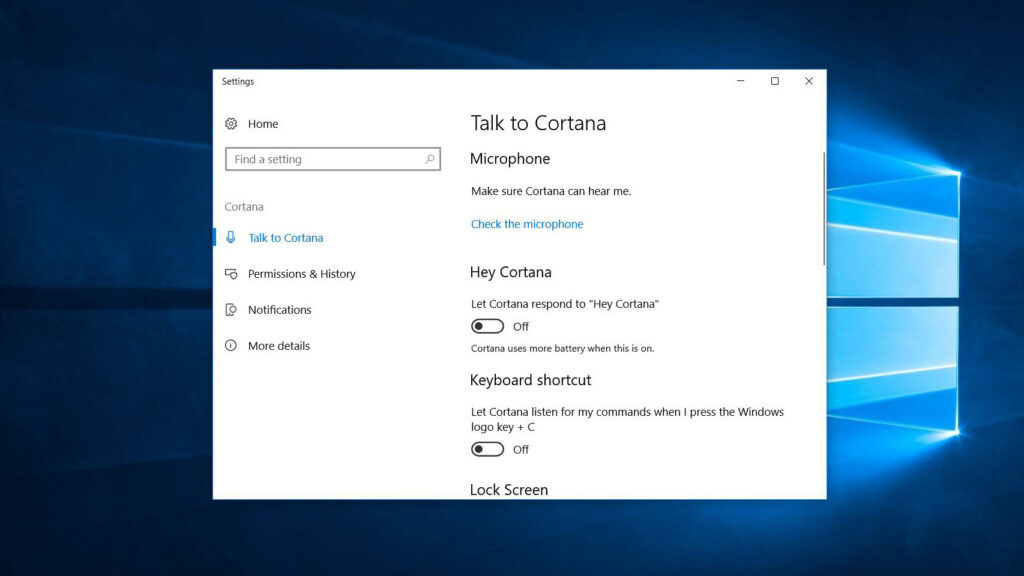
The Windows 10 Voice Assistant also consumes system resources to operate. If you don’t get much out of it, it’s better to do without Cortana and resort to the old Windows search box.
To do this, just click on the circle right next to the taskbar to activate the assistant. Then, click on the cogwheel located on the right to display the options, and proceed to disable everything that seems appropriate.
Change the Virtual Memory of the System
This option is specially designed for those computers with somewhat scarce RAM and that have little storage space.
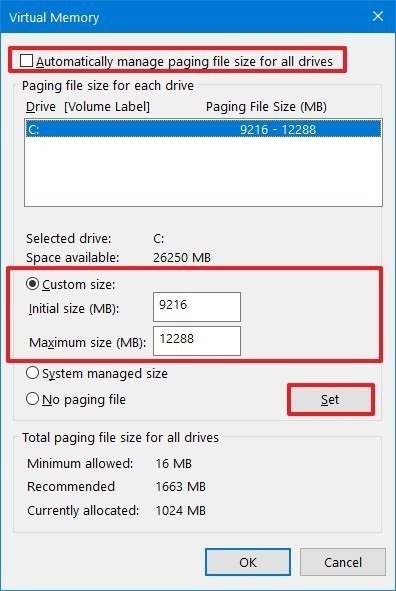
To do this, follow this path: Control Panel > System and Security > System > Advanced System Settings > Advanced Options > Settings (Performance) > Advanced Options, and finally look for Virtual Memory and click on the “Change” button.
Next, you must activate the option “Custom size”, and proceed to its configuration. The most common is to set the initial size, the value that appears below as recommended, in our case, 1,906 MB.
As for the maximum size, it is advisable to put a value equivalent to double or triple the maximum capacity of the RAM.
This post may contain affiliate links, which means that I may receive a commission if you make a purchase using these links. As an Amazon Associate, I earn from qualifying purchases.